
Restoring from a RAID drive failure in Ubuntu
One inevitable outcome when working with multiple RAID arrays is that you are going to encounter drive failure at some point, no matter how well you prepare. Luckily, when it comes to Ubuntu, the process to replace a failed drive is not terribly difficult. You’ve probably arrived here because you already have a RAID array with a failed drive in it, and you’re looking for a tutorial to replace it. So this tutorial is written for people running Ubuntu, already with an mdadm RAID-1 array set up and running.

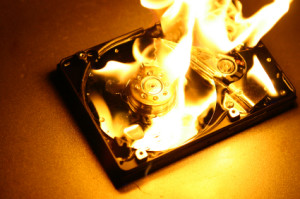
One possible cause of hard drive failure
You probably already know that the drive has failed for some reason. If you’ve instead come here with a sneaking suspicion, you’ll first want to check the drive states with: sudo mdadm --detail /dev/md*
This will show you the state of all the drives in the array. In the event of failure, you should see the problem at the bottom of the detail block. In this case, the problem was caused by me abruptly removing the second hard drive, as a test:
/dev/md0:

Version : 1.2

Creation Time : Wed Jul 10 23:30:41 2013

Raid Level : raid1

Array Size : 1855336256 (1769.39 GiB 1899.86 GB)

Raid Devices : 2

Total Devices : 1

Persistence : Superblock is persistent
Update Time : Wed Jul 17 20:02:45 2013

State : clean, degraded

Active Devices : 1

Working Devices : 1

Failed Devices : 0

Spare Devices : 0
Number Major Minor RaidDevice State

0 8 1 0 active sync /dev/sda1

1 0 0 1 removed
You can also see this in /proc/mdstat, where instead of [UU], you will see [U_].
When this happens, replace the drive immediately with the following procedure:
1) Remove the dead drive from the RAID array (above, sdb is the failed drive). In my case, I have my RAID array split into two partitions, a big one for data storage, and a small one for the /boot partition, so I need to remove two RAID members:
mdadm --manage /dev/md0 --remove /dev/sdb1

mdadm --manage /dev/md1 --remove /dev/sdb5
2) Replace the dead drive with a new one. If your motherboard or drive controller isn’t hotswap-capable, you’ll probably want to shutdown the server before you do this.
3) Check dmesg to see what ID the new drive has received (in this case, it was sdb).
4) Replicate the partitioning on the drives. In this case, sda contains the correct partitioning, so:
sudo sfdisk -d /dev/sda | sfdisk /dev/sdb
5) Check that the partitioning is now identical:
sudo fdisk -l /dev/sda /dev/sdb
6) Now add the new drive to the arrays. Assuming md0 is the large drive, and sdb1 is the large partition:
sudo mdadm --manage /dev/md0 --add /dev/sdb1

sudo mdadm --manage /dev/md1 --add /dev/sdb5
7) Now mdadm should show the drives are rebuilding:
gravity@TestBed:~$ sudo mdadm --detail /dev/md1

/dev/md1:

Version : 1.2

Creation Time : Wed Jul 10 23:30:46 2013

Raid Level : raid1

Array Size : 97979264 (93.44 GiB 100.33 GB)

Used Dev Size : 97979264 (93.44 GiB 100.33 GB)

Raid Devices : 2

Total Devices : 2

Persistence : Superblock is persistent
Update Time : Wed Jul 17 20:30:47 2013

State : clean, degraded, resyncing (DELAYED)

Active Devices : 1

Working Devices : 2

Failed Devices : 0

Spare Devices : 1
Name : TestBed:1 (local to host TestBed)

UUID : 641c56cc:f25ea01d:e2a5a7f8:2bd2d291

Events : 61
Number Major Minor RaidDevice State

0 8 5 0 active sync /dev/sda5

2 8 21 1 spare rebuilding /dev/sdb5
8) Once the drives have finished rebuilding, run sudo mdadm --detail /dev/md* once more. If all of the drive states return clean, your RAID array should be back to normal.
Credit for much of this information goes to How to Forge: http://www.howtoforge.com/replacing_hard_disks_in_a_raid1_array